I originally wrote this essay for a now-defunct blog. I’ve updated it with new links and information and am reposting it here.
Most people in their late 30’s and early 40’s learned “say-zee” as their first real acronym. For that, we have the TV show ZOOM to thank. ZOOM was designed as a highly interactive program, something almost unheard of in 1972, and encouraged kids to write to the show with their stories and ideas. Everyone who wrote was told to include a SASE. “What’s a ’say-zee?’” “It stands for Self-Addressed Stamped Envelope.”
(And thanks to the program being produced in Boston, I also have that show to thank for my pronouncing that word ON-vel-ope while most people here in South Jersey pronounce it EN-vel-ope.)
The SASE is a must for a would-be writer. It’s the most reliable way for a prospective agent, editor, or publisher to get in touch with you. There are some people who will use your SASE to say “yes” or “maybe,” so don’t think that they’re always negative when they show up in your mailbox.
Back when I was a kid, I had to write my SASE’s by hand. By the time I got to college, I started using pre-printed labels. But when I finally got truly serious about trying to make it as a writer, I needed my SASE’s mass produced. Once again, the wonders of modern technology.
Here’s how to produce a SASE in Microsoft Word (2007 and 2010). Other programs will use similar techniques.
- Click on the “Mailings” tab at the top of the window.
- Pick “Envelope.” It’s the left-most icon in the ribbon.
- Type your address in both the “return address” and “delivery address” fields.
- If you have Stamps.com internet postage installed, make sure that the “add electronic postage” box is not checked. More on this later.
- Save your file. You’ll need it later when you run out of printed SASE’s.
A few notes on addressing:
- Make sure your SASE’s are clear and easy to read. I like to use “Arial Narrow” 12 point for my return addresses and “Arial Black” 14 point for my “To” addresses. Easy to read, easy to scan.
- If your software lets you include “POSTNET” or “Intelligent Mail” barcodes (like Wordperfect does), then use them, at least for now. They’re easier for the post office’s scanners to read than most written ZIP codes and speed up the automation. The Post Office started phasing out POSTNET in 2011 for the new Intelligent Mail Barcode, but POSTNET is still used..
- Always use your ZIP+4 code. If you don’t know your ZIP+4, then look it up.
Now we come to the most important part of the self-addressed stamped envelope: the stamp. While you could use any old stamp, or even the “netstamps” spit out by stamps.com (but not the postmarked ones printed right on an envelope!), your best bet is the little wonder called the “Forever” stamp.
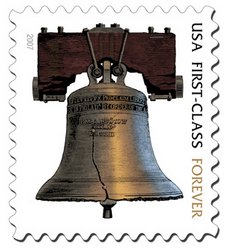
Not only can “Forever” stamps save you money in the long run if you buy buttloads of them right before a postage rate increase, their magical staying power serves a more important purpose. One thing to remember is that you have no guarantee how long it’s going to take for an agent, editor, or publisher to respond to you. My personal record at the moment is eleven months, but longer waits are not unheard of. Rate increases come with horribly little warning. There is a fair chance that between the time your prospective agent gets your SASE and when they get around to mailing it back to you, the rate will have gone up.
What happens when your SASE sits in a slushpile while the rates change is as variable as everything else in this game. Some agents will be nice and stick an extra 1 or 2 cent stamp on it and send it out. Some will just send it to you, running the risk of it arriving postage due. Some will just throw it out. Never leave it up to chance. By using a “forever” stamp you ensure that no matter when it gets dropped in the outgoing post, it will have sufficient postage on it. Pick up a pack of “forevers” at your post office or, if you’re agoraphobic, buy them online.
This brings up another point: if the agent asks for a partial with your query, don’t bother sending oversized SASE’s with sufficient postage to cover sending the partial back to you. It’s easier for the agent to just send communication in a normal #10 than to repack everything for you. You’ll also spend more in return postage than it will cost you in paper and toner to just run off another copy. Rejection letters rarely run more than one page, anyhow, so one stamp on a #10 is sufficient; if the agent really needs to tell you more than they can in a single page letter, they’ll probably contact you anyhow.
Another great thing is that SASE’s printed this way are wonderfully lightweight things. My handy postage scale here tells me that my standard SASE weighs less than one tenth of an ounce. If you’re sending out snail mail queries without partials (like most queries are supposed to be), then a single sheet of paper and a SASE will still weigh less than one ounce, sufficient for a single 46 cent (or whatever the current rate is) stamp. Just fold your SASE in thirds as you fold your query, put them both in an envelope with a single stamp on it, and you’re good to go.
Last but by no means least, every snail mail query and every piece of requested material (partial or full) should have a SASE in it. The easier you make an agent’s life, the happier they are.
Be First to Comment